.Net8实现elasticsearch7 基于本地和AWS S3、local stack s3 备份还原踩坑篇
需求:我需要实现基于本地和AWS s3作为repository实现备份还原功能的类库项目,供其他团队或者其他程序使用。
简单总结:首先ES的net nuget本身与ES客户端有些耦合,此时(2024年5月)Elastic.Clients.Elasticsearch Nuget(version 8.13.12)不完全兼容ES7,同时还有bug,例如我测试到create repository就不能创建repository,ES客户端是对应的elasticsearch:8.13.4
我自己测试通过的方案是Nest+ES7 基于本地repository(这个方案是可行的,也没什么坑)
需求还需要支持S3,基于local stack s3没有测试通过,目前:ES7请求到了 s3,但是提示没有这个bucket,其实这个bucket是存在的,我不清楚为什么,同时也测试了,而且local stack s3日志也是没有这个bucket,细节可以看下面2个issue,公司现在提供了AWS s3,已经测通。
ES8 issue:https://github.com/elastic/elasticsearch-net/issues/8187 (Elastic.Clients.Elasticsearch Nuget)
ES7 issue: https://github.com/elastic/elasticsearch-net/issues/8192 (Nest Nuget)
基于本地实现:(推荐)
基于aws s3实现:(不那么推荐,首先,一切的配置都需要在ES的config.yml文件和client配置好,其次,需要如果没有AWS s3服务,基于Local stack s3来测试,第一,资料比较少,其次,可能本身客户端与ES也有不兼容问题。最好是使用AWS s3来测。)
环境搭建准备
ES7 docker compose.yml(8只需要修改image tag 的版本数字即可,如果有弃用的配置日志会提示,跟着修改即可)
8的版本默认开启安全特性,只能https,需要关闭ssl
需要修改配置即可,挂载到windows系统,会出现.yml .d等文件,windows系统会认为这个是文件夹,所以需要docker cp文件出来
还有就是没有jvm.options这个文件,只挂载config.yml配置文件会出错。
拷贝es容器文件夹config到宿主机目录,./web/es/是宿主机的目录
docker cp elasticsearch:/usr/share/elasticsearch/config ./web/es/
xpack.security.enabled=false
version: '3'
services:
  elasticsearch:
    image: docker.elastic.co/elasticsearch/elasticsearch:7.17.7
    container_name: elasticsearchdemo
    network_mode: host
    environment:
      - node.name=elasticsearch
      - cluster.name=docker-cluster
      - discovery.type=single-node
      - "ES_JAVA_OPTS=-Xms512m -Xmx512m"
      - xpack.security.enabled=true
      - ELASTIC_PASSWORD=password
      - "xpack.security.http.ssl.enabled=false"
    ports:
      - "9200:9200"
    volumes:
      - ./config/elasticsearch.yml:/usr/share/elasticsearch/config/elasticsearch.yml  # 挂载自定义配置文件
ES config.yml
删除了net work 0.0.0.0,不然与local stack S3无法连接
path.repo 是基于本地创建repository的必要参数,也就是ES创建snapshot的地方(容器内的地址,这个目录可以挂载到宿主机上)
s3.client.default.的相关配置是基于local stack s3的相关配置,不然访问不了,因为ES默认会直接请求AWS 的地址:
官方配置地址:
https://www.elastic.co/guide/en/elasticsearch/reference/current/repository-s3.html
成功运行ES容器之后,需要进入容器,执行命令:只需要配置access_key 和secret_key
输入的值与下面local stack s3的docker compose yml值一样
AWS_ACCESS_KEY_ID=test
AWS_SECRET_ACCESS_KEY=test
添加
bin/elasticsearch-keystore add s3.client.default.access_key
bin/elasticsearch-keystore add s3.client.default.secret_key
# a session token is optional so the following command may not be needed
bin/elasticsearch-keystore add s3.client.default.session_token
移除
bin/elasticsearch-keystore remove s3.client.default.access_key
bin/elasticsearch-keystore remove s3.client.default.secret_key
# a session token is optional so the following command may not be needed
bin/elasticsearch-keystore remove s3.client.default.session_token
cluster.name: "docker-cluster"


xpack.security.http.ssl.enabled: false
s3.client.default.endpoint: "http://localhost:4566"
s3.client.default.protocol: "http"

path:
  repo:
    - /usr/share/elasticsearch/data/backups
    - /usr/share/elasticsearch/data/long_term_backups
注意事项,此处的s3的相关配置需要先注释掉,不然直接启动docker compose.yml会报如下错误,没有安装S3 plugin,识别不了这些参数,如果使用AWS S3,需要注释s3.client.default相关的配置。这是为local stack s3配置的

local stack s3
主要的坑,其实是环境问题:
1.需要修改net work为host,或者自己创建一个自定义网络,让local stack s3与ES7在这个同一个网络
2.需要修改OPENSEARCH_ENDPOINT_STRATEGY=port,不然http://localhost:4566请求到不了S3,
详细的策略,请看官方地址:https://docs.localstack.cloud/user-guide/aws/opensearch/#domain-endpoints
配置参数官方地址:https://docs.localstack.cloud/references/configuration/#core
version: '3'
services:

  localstack:
    image: localstack/localstack:s3-latest
    container_name: localstack
    network_mode: host
    ports:
      - "4566:4566"
      - "4571:4571"
      - "8055-8080:8055-8080"
    environment:
      - DEBUG=1
      - ALLOW_NONSTANDARD_REGIONS=1
      - SERVICES=s3
      - OPENSEARCH_ENDPOINT_STRATEGY=port
      - LOCALSTACK_HOST=localhost
      - PERSISTENCE=/tmp/localstack/data
      - AWS_ACCESS_KEY_ID=test
      - AWS_SECRET_ACCESS_KEY=test

代码:
由于基于本地的没什么太多坑,如何用Nest和ES7(最新版本的Nuget还有bug,)虽然Nest 已经官方弃用,但是如果为了稳定,建议采用这个方案,等后续最新的nuget稳定再迁移。也可以现在2个nuget都使用。我只能提供完整的单元测试代码,具体的接口什么的,需要自己实现。我不方便提供。
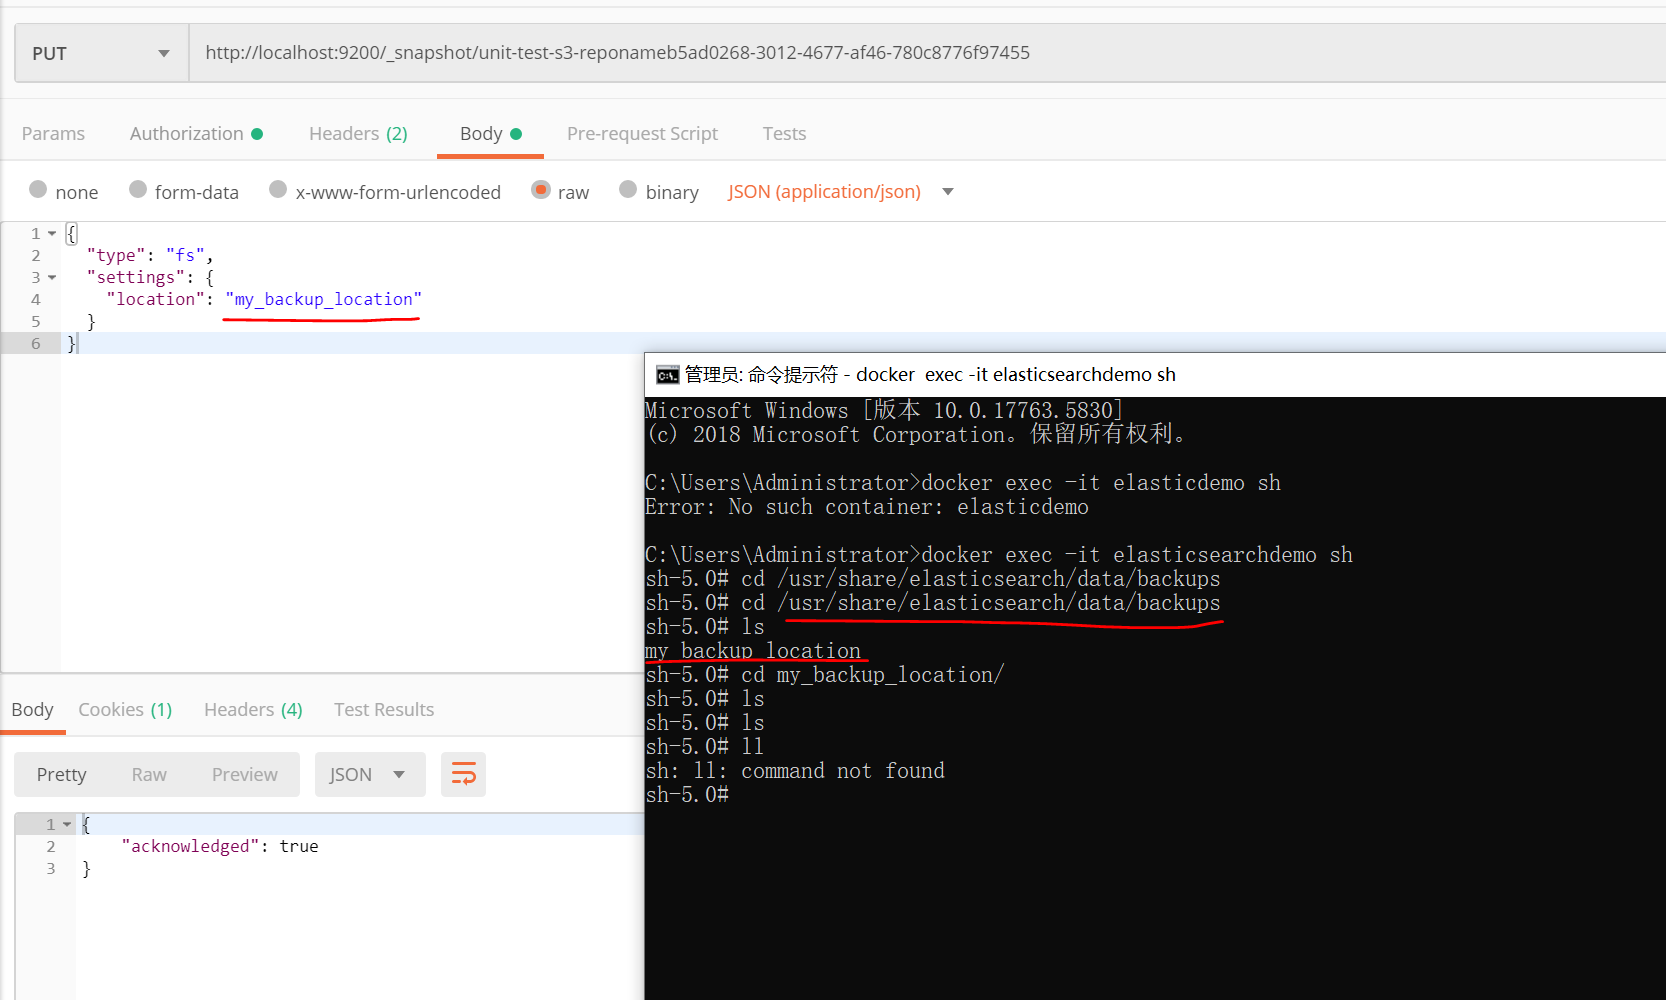
postman本地测试:
http://localhost:9200/_snapshot/unit-test-fs-reponameb5ad0268-3012-4677-af46-780c8776f97455
http://localhost:9200/_snapshot/my-fs-repository
{
  "type": "fs",
  "settings": {
    "location": "my_backup_location"
  }
}
这个路径/usr/share/elasticsearch/data/backups就是config.yml 文件里面的path.repo,
my_backup_location是传入的location,可以理解为一个文件夹,等同于ES的repository,创建snapshot,就在这个目录下面的存档备份文件
单元测试完整代码
project文件,主要是给出Nuget包
<Project Sdk="Microsoft.NET.Sdk">

  <PropertyGroup>
    <TargetFramework>net8.0</TargetFramework>
    <ImplicitUsings>enable</ImplicitUsings>
    <Nullable>enable</Nullable>

    <IsPackable>false</IsPackable>
    <IsTestProject>true</IsTestProject>
  </PropertyGroup>

  <ItemGroup>
    <PackageReference Include="AWSSDK.S3" Version="3.7.308.4" />
    <PackageReference Include="coverlet.collector" Version="6.0.0" />
    <PackageReference Include="FluentAssertions" Version="6.12.0" />
    <PackageReference Include="Microsoft.NET.Test.Sdk" Version="17.8.0" />
    <PackageReference Include="NEST" Version="7.17.5" />
    <PackageReference Include="xunit" Version="2.5.3" />
    <PackageReference Include="xunit.extensibility.core" Version="2.8.0" />
    <PackageReference Include="xunit.runner.visualstudio" Version="2.5.3" />
  </ItemGroup>

  <ItemGroup>
    <Using Include="Xunit" />
  </ItemGroup>

</Project>
ESNestS3RepositoryTest
using FluentAssertions;
using Nest;

namespace UnitTestProject
{
    public class ESNestS3RepositoryTest
    {
        private readonly ElasticClient _client;

        public ESNestS3RepositoryTest()
        {
            //如果connectionSettings传uri为空 默认就是http://localhost:9200
            var connectionSettings = new ConnectionSettings().BasicAuthentication("elastic", "password");
            //.DefaultIndex("default_index"); // Set the default index if needed
             _client = new ElasticClient(connectionSettings);
        }

        //基于本地创建repository,其实基于S3与本地区别不大 ,关键在于repository创建在哪里,snapshot存在哪里,其他还原什么的都是一样的
        [Fact]
        public async Task RestoreFSSnapshot_Success()
        {
            //arrange

            string repositoryName = "test_repo" + Guid.NewGuid();
            //snapshot 必须所有的字母都是小写
            string snapshotName = "test_snapshot" + Guid.NewGuid();
            string findPrefix = "test_find_prefix-";
            string replacePrefix = "test_restored_prefix-";
            string indexName = "index_test";
            string path = "test_store_sp_path";

            //先准备干净环境
            await _client.Indices.DeleteAsync("*");

            //模拟一些索引
            for (int i = 0; i < 10; i++)
            {
                await _client.Indices.CreateAsync(findPrefix + indexName + i);
            }

            //act

            //创建snapshot

            await _client.Snapshot.CreateRepositoryAsync(repositoryName,
            c => c.FileSystem(fs => fs.Settings(path)));

            //自己实现需要先判断snapshot是否存在,存在就删除,再创建一个新的Snapshot
            var response = await _client.Snapshot.SnapshotAsync(repositoryName, snapshotName,
                sp => sp.Indices(findPrefix + "*")
                    .IgnoreUnavailable(true)
                    .RequestConfiguration(req => req.DisableDirectStreaming())//可以注释掉
                    .IncludeGlobalState(false));

            //这个是为了怕还原的时候,snapshot还没创建成功,时间自己具体修改
            Thread.Sleep(15000);


            //ES还原
            var snapshotInfo = await _client.Snapshot.GetAsync(repositoryName, snapshotName);


            if (snapshotInfo.Snapshots == null) throw new NullReferenceException($"{snapshotName} is not exist");

            //删除如果被还原索引名相同的list
            var indicesToRenameList = snapshotInfo.Snapshots.ToList()[0].Indices
                .Where(index => index.ToString().StartsWith(findPrefix))
                .Select(index => index.ToString().Replace(findPrefix, replacePrefix))
                .ToList();

            foreach (var index in indicesToRenameList)
            {
                //删除索引
                await _client.Indices.DeleteAsync(index);
            }

            //这个是被还原前的索引名
            var renamePattern = findPrefix;
            //还原后的名字,例如 a-xxx  还原后变成了 b-xxx

            var renameReplacement = replacePrefix;

            var result = await _client.Snapshot.RestoreAsync(repositoryName, snapshotName,
                r => r.IgnoreUnavailable(true)
                    .IncludeGlobalState(false)
                    .RenamePattern(renamePattern)
                    .RenameReplacement(renameReplacement)
                    .RequestConfiguration(req => req.DisableDirectStreaming())
                    .WaitForCompletion(true));


            var indicesMatchCount = await _client.Indices.GetAsync(replacePrefix + "*");

            //assert
            Assert.True(result.ApiCall.HttpStatusCode.Equals(200));

            indicesMatchCount.Indices.Should().HaveCountGreaterThan(0);
        }


        //除了创建repository方法不一样,其他都一样,我这里本地测试不过,但是代码是不需要改的,主要是ES和local stack s3或者AWS s3能正常连接
        [Fact]
        public async Task Restore_LocalStackS3_Snapshot_Success()
        {
            //arrange

            //snapshot 必须所有的字母都是小写
            string snapshotName = "test_snapshot" + Guid.NewGuid();
            string findPrefix = "test_find_prefix-";
            string replacePrefix = "test_restored_prefix-";
            string indexName = "index_test";
            string repoName = "unit-test-s3-reponame" + Guid.NewGuid();
            string bucketName = "my-bucket"; // bucket name

            //先准备干净环境
            await _client.Indices.DeleteAsync("*");

            //模拟一些索引
            for (int i = 0; i < 10; i++)
            {
                await _client.Indices.CreateAsync(findPrefix + indexName + i);
            }

            //act

            //创建S3 repository
            await _client.Snapshot.CreateRepositoryAsync(repoName,c => c.S3(s3 => s3.Settings(bucketName)));


            //自己实现需要先判断snapshot是否存在,存在就删除,再创建一个新的Snapshot
            var response = await _client.Snapshot.SnapshotAsync(repoName, snapshotName,
                sp => sp.Indices(findPrefix + "*")
                    .IgnoreUnavailable(true)
                    .RequestConfiguration(req => req.DisableDirectStreaming())
                    .IncludeGlobalState(false));

            //这个是为了怕还原的时候,snapshot还没创建成功,时间自己具体修改
            Thread.Sleep(15000);

            //ES还原
            var snapshotInfo = await _client.Snapshot.GetAsync(repoName, snapshotName);

            if (snapshotInfo.Snapshots == null) throw new NullReferenceException($"{snapshotName} is not exist");

            //删除如果被还原索引名相同的list
            var indicesToRenameList = snapshotInfo.Snapshots.ToList()[0].Indices
                .Where(index => index.ToString().StartsWith(findPrefix))
                .Select(index => index.ToString().Replace(findPrefix, replacePrefix))
                .ToList();

            foreach (var index in indicesToRenameList)
            {
                //删除索引
                await _client.Indices.DeleteAsync(index);
            }

            //这个是被还原前的索引名
            var renamePattern = findPrefix;
            //还原后的名字,例如 a-xxx  还原后变成了 b-xxx

            var renameReplacement = replacePrefix;

            var result = await _client.Snapshot.RestoreAsync(repoName, snapshotName,
                r => r.IgnoreUnavailable(true)
                    .IncludeGlobalState(false)
                    .RenamePattern(renamePattern)
                    .RenameReplacement(renameReplacement)
                    .RequestConfiguration(req => req.DisableDirectStreaming())
                    .WaitForCompletion(true));


            var indicesMatchCount = await _client.Indices.GetAsync(replacePrefix + "*");

            //assert
            Assert.True(result.ApiCall.HttpStatusCode.Equals(200));

            indicesMatchCount.Indices.Should().HaveCountGreaterThan(0);
        }

    }
}
单元测试一样,只不过创建repository不一样,基于repository的type是S3,我还是提供完整的代码,方便copy直接可用。
 //创建S3 repository
await _client.Snapshot.CreateRepositoryAsync(repoName,c => c.S3(s3 => s3.Settings(bucketName)));
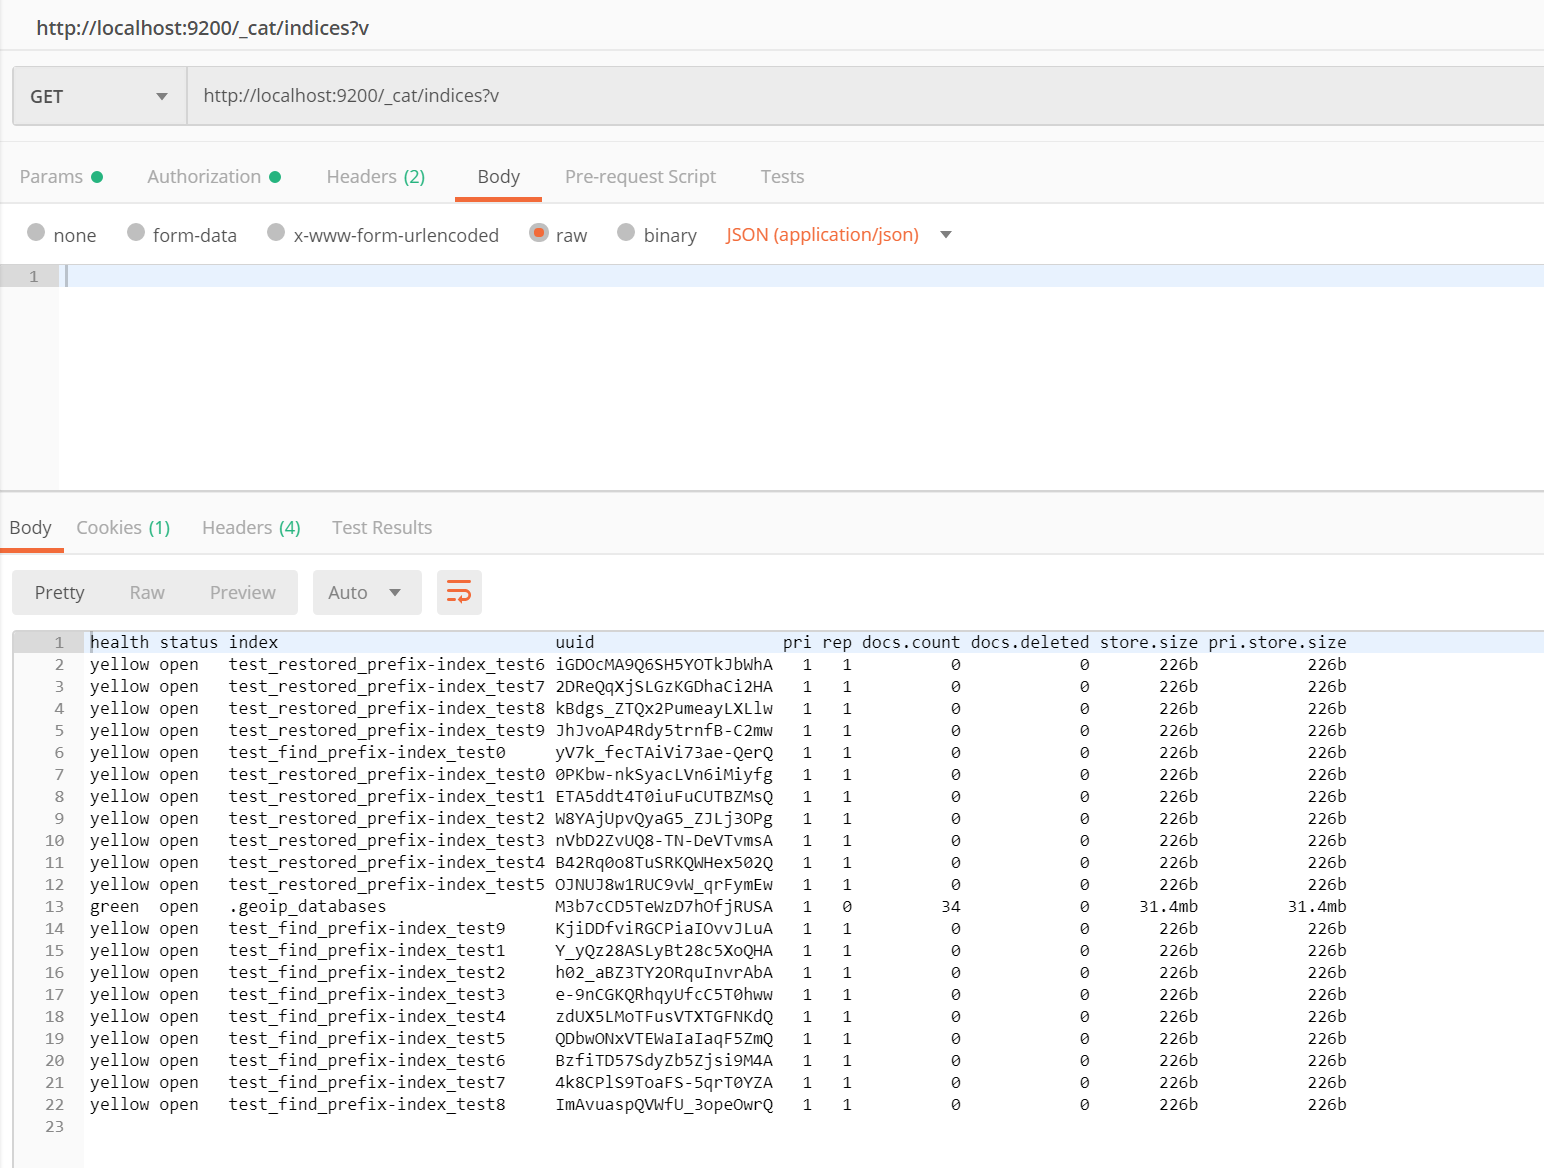
还原后的索引如下图:
Local stack s3 测试代码
using Amazon.Runtime;
using Amazon.S3;
using Amazon.S3.Model;
using FluentAssertions;
using System.Net;

namespace UnitTestProject
{
    public class LocalStackS3Test
    {
        [Fact]
        public async Task Check_LocalStackS3_Valid()
        {
            //arrange
            string bucketName = "my-bucket"; // bucket name
            string serviceUrl = "http://localhost:4566"; // Localstack s3 service URL

            var awsCredentials = new BasicAWSCredentials("test", "test");
            var config = new AmazonS3Config
            {
                ServiceURL = serviceUrl,
                ForcePathStyle = true,
            };

            //也可以使用这种方式创建client
            var regionEndpoint = RegionEndpoint.GetBySystemName("us-east-1");
            var client2 = new AmazonS3Client("test", "test", regionEndpoint);

            var client = new AmazonS3Client(awsCredentials, config);

            var putBucketRequest = new PutBucketRequest
            {
                BucketName = bucketName,
                BucketRegion = S3Region.USEast1,
                UseClientRegion = false
            };

            //如果你的key 对这个S3有权限 可以使用这个操作S3 bucket 权限
           /* var policy = @"{
  ""Version"": ""2012-10-17"",
  ""Statement"": [
    {
      ""Effect"": ""Allow"",
      ""Principal"": ""*"",
      ""Action"": [
        ""s3:GetObject"",
        ""s3:PutObject"",
        ""s3:DeleteObject"",
        ""s3:AbortMultipartUpload"",
        ""s3:ListMultipartUploadParts""
      ],
      ""Resource"": ""arn:aws:s3:::my-bucket/*""
    }
  ]}";

            var putBucketPolicyRequest = new PutBucketPolicyRequest
            {
                BucketName = bucketName,
                Policy = policy
            };*/

            //act
            var res = await client.PutBucketAsync(putBucketRequest);

            //update policy
            //await client.PutBucketPolicyAsync(putBucketPolicyRequest);

            //put a file into bucket,
            // Generate an image file
            byte[] imageBytes = GenerateImageBytes();
            string keyName = "example_image.jpg";

            var putObjectRequest = new PutObjectRequest
            {
                BucketName = bucketName,
                Key = keyName,
                InputStream = new MemoryStream(imageBytes)
            };

            var putObjectResponse = await client.PutObjectAsync(putObjectRequest);

            //assert
            //putObjectResponse.HttpStatusCode.Should().Be(HttpStatusCode.OK);

            res.HttpStatusCode.Should().Be(HttpStatusCode.OK);
        }

        private byte[] GenerateImageBytes()
        {
            byte[] fakeImageBytes = new byte[1024];
            return fakeImageBytes;
        }

    }
}
AWS s3的测试图,不方便截图,代码是可用的。如果是local stack s3 ,可以关注开头的issue.
注意事项
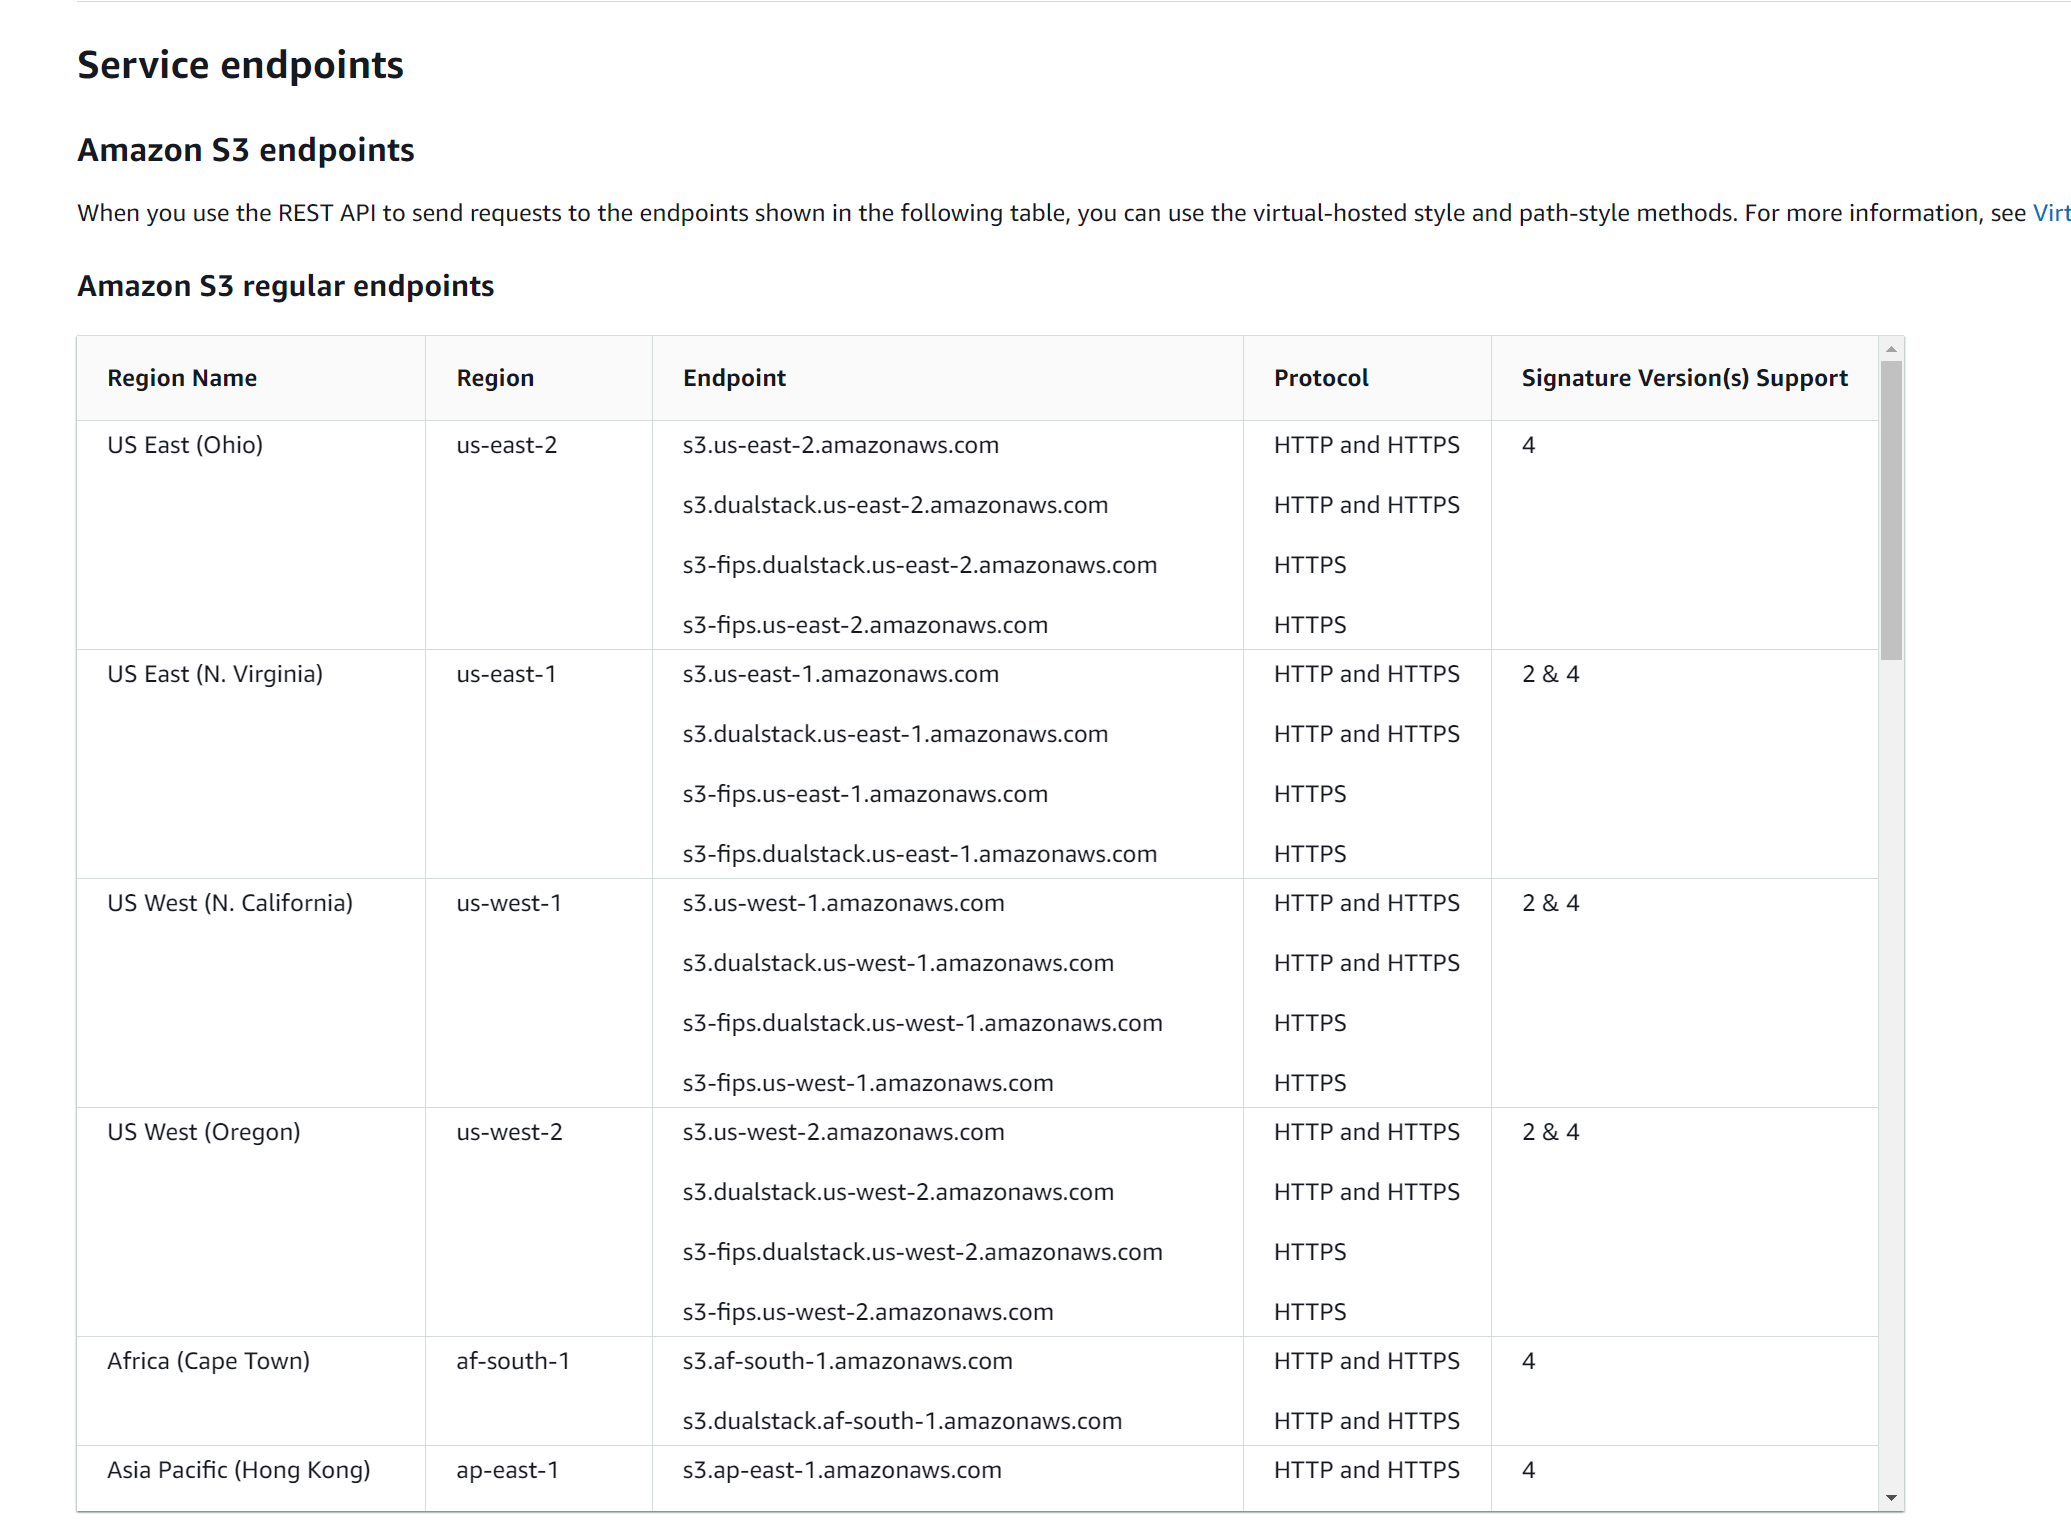
如果基于aws s3来测试的话,注意官方endpoint拼接地址
官方url地址:https://docs.aws.amazon.com/general/latest/gr/s3.html#s3_region
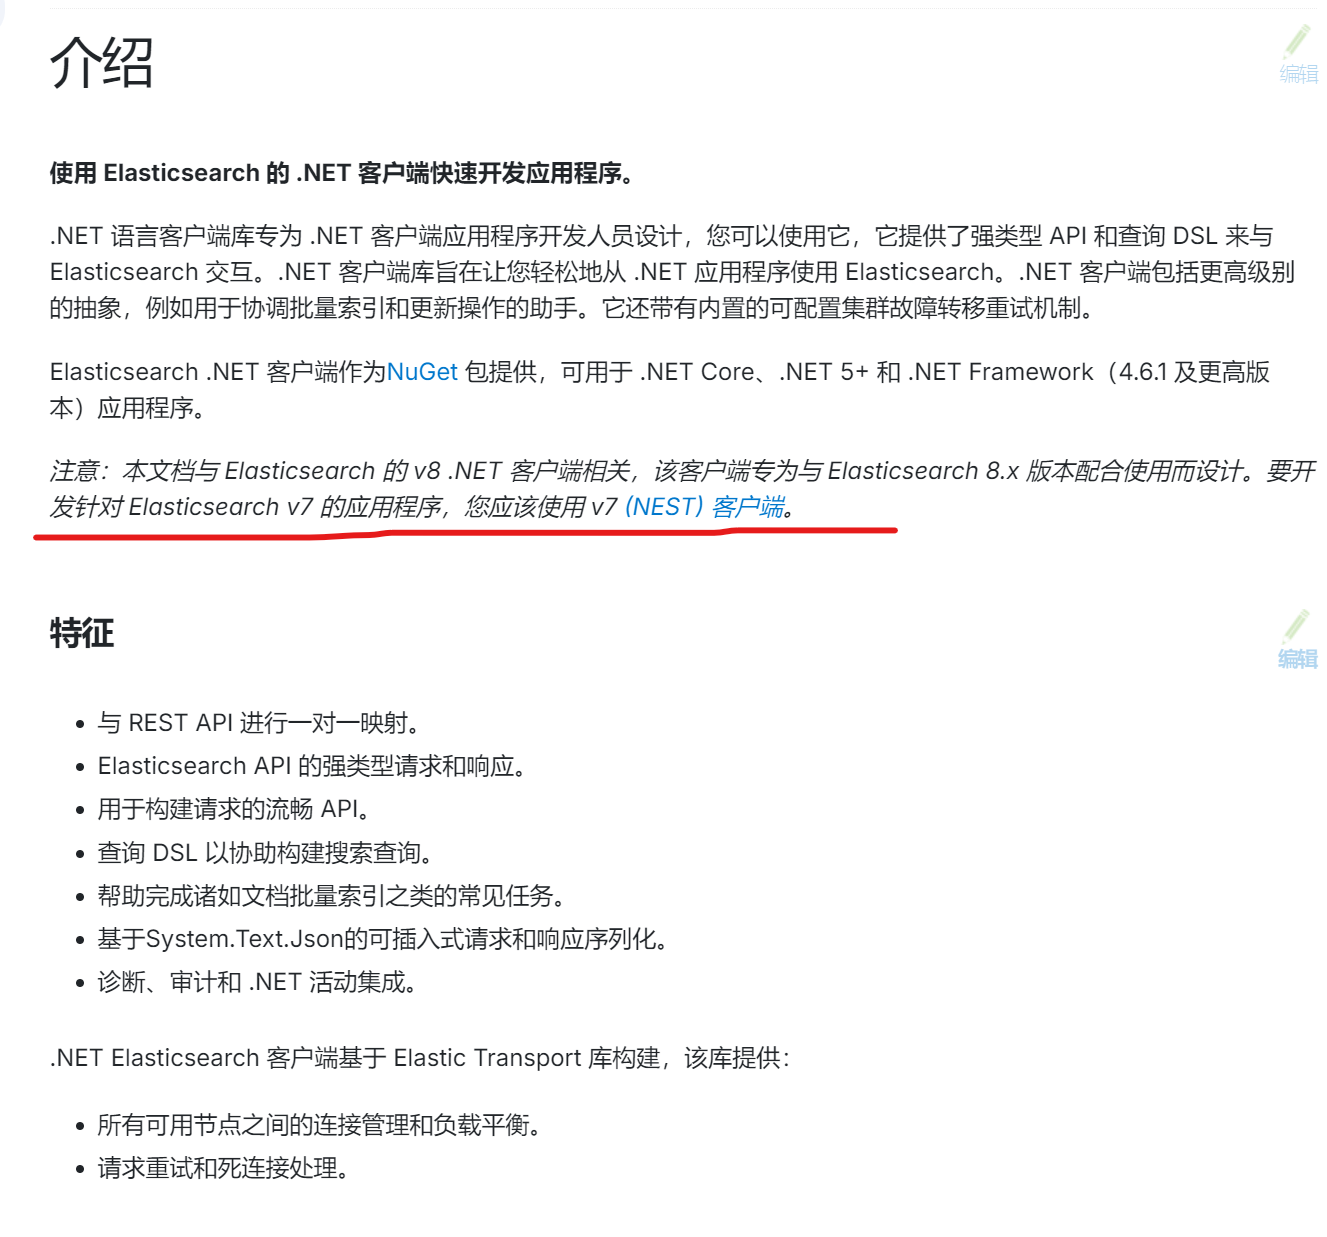
sdk 本身的版本与ES 客户端版本耦合:
https://www.elastic.co/guide/en/elasticsearch/client/net-api/master/introduction.html
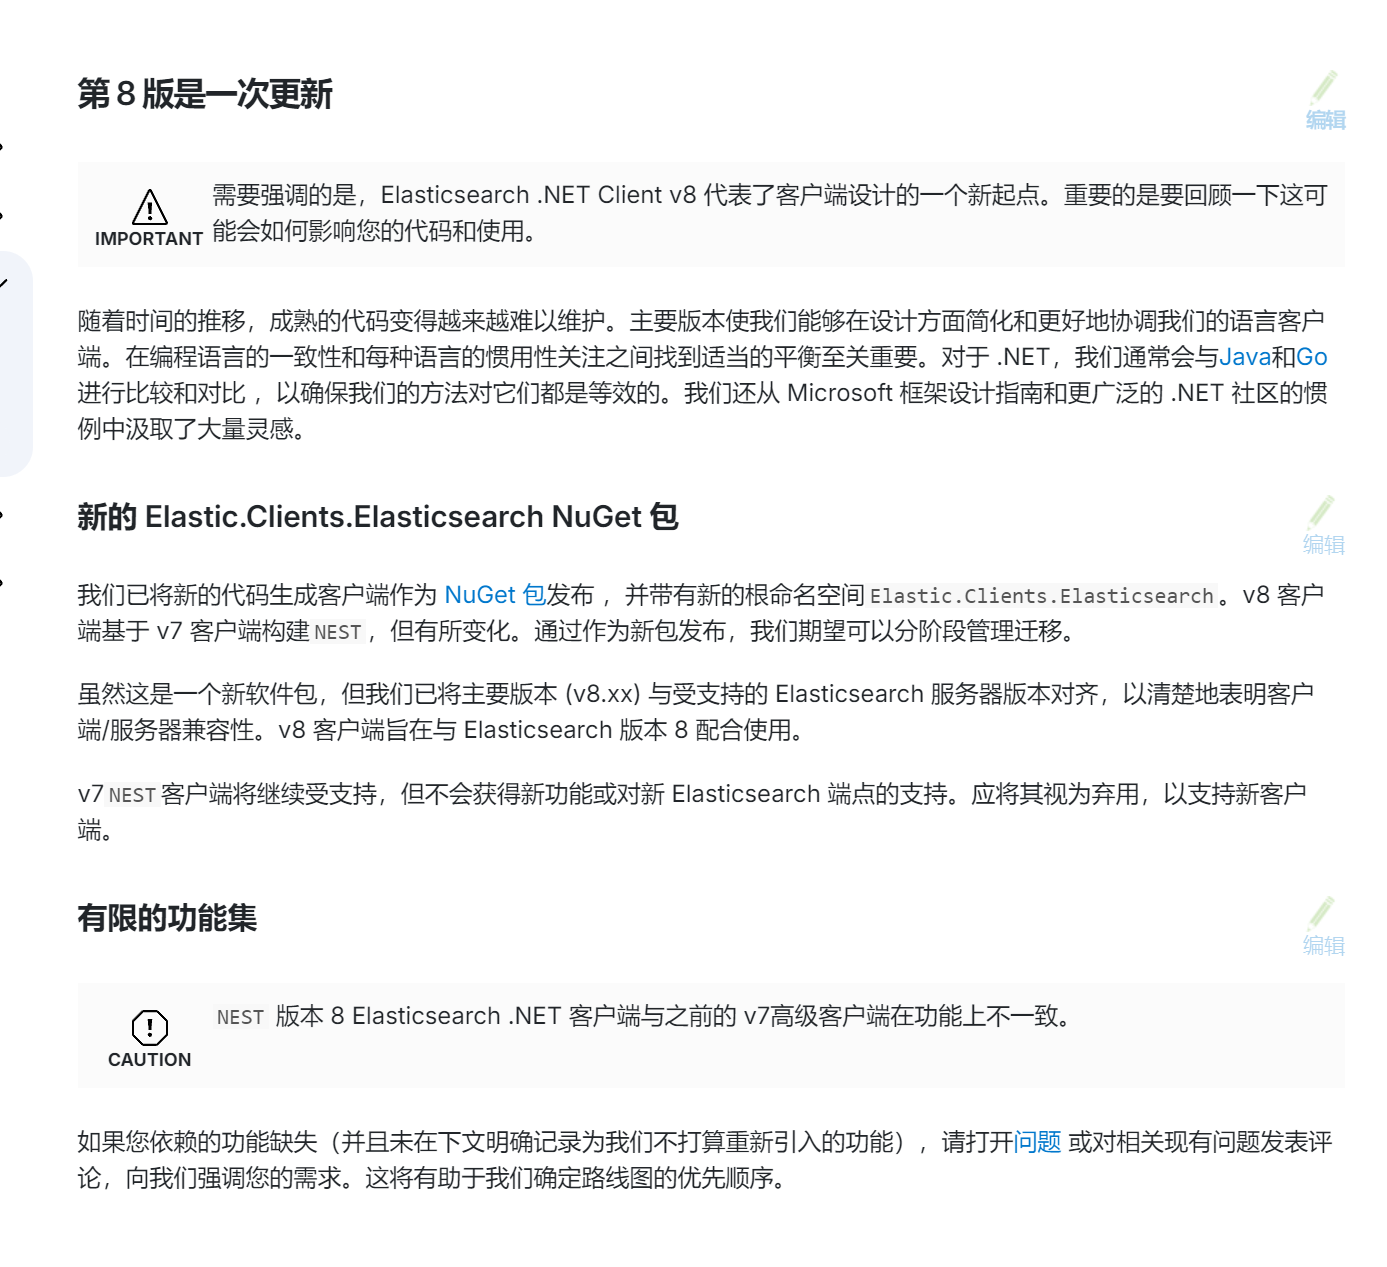
ES 7迁移到ES 8官方地址:
https://www.elastic.co/guide/en/elasticsearch/client/net-api/master/migration-guide.html
总结
总的来说,现在最新的还不稳定,基本上现在主流的迁移是同时使用Nest和Elastic.Clients.Elasticsearch Nuget(version 8.13.12),等新的完全稳定之后,再完全迁移。我本人只测试了最新的Elastic.Clients.Elasticsearch Nuget去操作删除ES7的索引,但是第二个测创建repository有bug,已经提了issue,再开头。基于local stack s3来测试,也可以看开头写的issue。环境还是有问题。目前已经基于AWS S3来实现,测通,实现的代码并不需要修改。
如果使用AWS s3,就跟官方ES8文档一样,安装S3 plugin之后,进入容器,顺序添加accessKey和secretKey,之后重启ES即可。
